

In today’s economy, where grocery prices are high and budgets are tight, home cooks are facing a new challenge: how to make flavorful, satisfying meals without overspending. Yet, constraints often breed creativity, and cooking on a budget doesn’t mean sacrificing taste. With the right ingredients, techniques, and a bit of know-how, you can still craft delicious meals and baked goods that feel indulgent—even on a dime.
The Flavor Factor: Making Every Ingredient Count
Impactful flavor doesn’t require expensive ingredients. What it does require is understanding how to build and balance taste.
1. Lean on Pantry Staples
Pantry items like garlic, onions, canned tomatoes, rice, beans, pasta, and spices can be turned into endless meals. A can of chickpeas can become hummus, a curry, or be roasted for a snack. Pasta paired with olive oil, garlic, and crushed red pepper flakes makes a vibrant dish in minutes.
2. Spices Are Small but Mighty
Spices might seem expensive up front, but they go a long way and last for months. Basics like cumin, paprika, cinnamon, and chili powder can transform bland meals into aromatic feasts. Buying spices in bulk or from discount stores is a smart way to stock up without breaking the bank.
3. Acid and Salt: The Unsung Heroes
A splash of vinegar or squeeze of lemon can brighten a dish just as much as an expensive sauce. Likewise, seasoning food properly with salt elevates every bite. If you want bold flavor, don’t be afraid of salt—just be strategic.
Baking on a Budget: Simple Ingredients, Big Returns
Home baking doesn’t require pricey specialty flours or imported chocolate to impress. Some of the most beloved baked goods—from banana bread to biscuits—come from humble origins.
1. Use What You Have
Overripe bananas? Make banana bread. Stale bread? French toast or bread pudding. Baking on a budget means using every bit of what’s on hand. Don’t toss that yogurt nearing expiration—it can moisten muffins or cakes. Applesauce, mashed sweet potatoes, and even soda can become baking ingredients.
2. Affordable Staples That Go Far
Flour, sugar, baking soda, and eggs are inexpensive but incredibly versatile. A basic dough recipe can yield cookies, pie crusts, biscuits, or even flatbreads. Cornmeal is another underused gem—great for cornbread, polenta, or muffins.
3. Elevate with Extracts and Zests
Vanilla extract, almond extract, citrus zest, or a dash of cinnamon can add aroma and richness to baked goods. These small additions cost little per use but bring luxury to even the simplest desserts.
Modern Hacks for the Budget Cook
Today’s cook has access to more tools than ever—social media, food blogs, and apps offer a treasure trove of free recipes and inspiration for low-cost meals.
1. Plan Ahead
Meal planning cuts waste and helps you stretch ingredients across several meals. Roast a chicken on Sunday, then turn the leftovers into soup, tacos, or fried rice throughout the week.
2. Shop Smart
Buying in bulk, choosing store brands, and shopping sales make a big difference. Farmers markets and discount produce bins often offer cheaper, fresher ingredients than big-box stores.
3. Batch Cooking and Freezing
Making meals in larger quantities saves time and money. Freeze soups, sauces, and baked goods for later. It’s like having a homemade “fast food” option in your freezer.
Final Thoughts: Budget Doesn’t Mean Boring
Great food doesn’t require great expense. In fact, many of the world’s most beloved dishes—from Italian pasta to Indian dal—originated from necessity, not luxury. What they have in common is depth of flavor, resourceful use of ingredients, and cultural ingenuity.
With a little planning, a dash of creativity, and a willingness to experiment, budget cooking can be just as delicious—and even more satisfying—than meals made with a bigger price tag.
After all, cooking on a budget isn’t just about saving money. It’s about reclaiming the joy of simple, homemade food that brings comfort, nourishment, and flavor to your table.

Here’s a budget-friendly pasta dish that’s bursting with flavor, made with affordable pantry staples and a few fresh ingredients:
Garlic Butter Chili Pasta with Crispy Breadcrumbs
Serves: 4
Estimated Cost: Under $8 total (about $2 per serving)
Ingredients:
12 oz spaghetti or any pasta you have on hand
4 tablespoons butter or olive oil (or a combo)
6 cloves garlic, thinly sliced or minced
1 teaspoon red pepper flakes (adjust to taste)
1/2 teaspoon salt (plus more for pasta water)
1/2 teaspoon black pepper
1/2 cup reserved pasta water
1/2 cup breadcrumbs (preferably panko or homemade)
1 tablespoon olive oil (for toasting breadcrumbs)
Zest of 1 lemon (optional but amazing)
2 tablespoons chopped parsley (optional for freshness)
Grated Parmesan or nutritional yeast (optional topping)
Instructions:
Cook the pasta: Boil a large pot of salted water and cook your pasta until just al dente. Reserve 1/2 cup of the pasta water, then drain and set aside.
Make crispy breadcrumbs: In a skillet, heat 1 tablespoon olive oil over medium heat. Add breadcrumbs and a pinch of salt. Toast, stirring often, until golden brown and crispy (about 3–5 minutes). Remove and set aside.
Make garlic-chili butter sauce: In the same skillet, melt butter (or olive oil) over medium-low heat. Add the garlic and cook gently until fragrant and golden—don’t let it burn. Add red pepper flakes, salt, and black pepper. Stir for 30 seconds.
Add pasta to the sauce: Toss the drained pasta into the skillet with the garlic-chili butter. Pour in the reserved pasta water and toss until everything is coated and silky. Add lemon zest and parsley if using.
Serve and top: Plate the pasta and sprinkle with the crispy breadcrumbs for crunch. Top with grated Parmesan or nutritional yeast for an extra savory boost.
Why This Works on a Budget:
Pantry-based: You likely already have pasta, garlic, and oil on hand.
High flavor, low cost: Garlic, red pepper flakes, and lemon zest deliver BIG flavor without extra expense.
Textural contrast: The crispy breadcrumbs act like a “poor man’s Parmesan,” giving you that savory crunch without needing cheese.
This pasta is rich, comforting, and has a nice kick—simple enough for a weeknight, but flavorful enough to impress.
Here’s a budget-friendly main dish that’s hearty, full of flavor, and easy on the wallet:
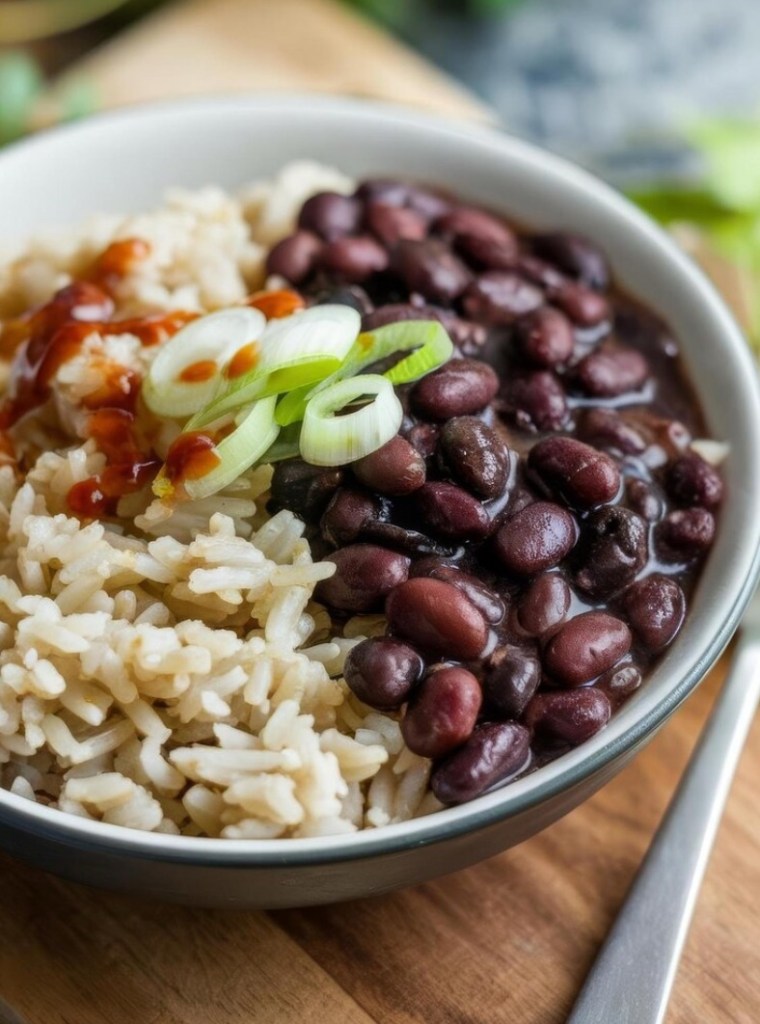
Smoky Black Bean and Rice Skillet
Serves: 4–6
Estimated Cost: Under $6 total (about $1–$1.50 per serving)
Prep + Cook Time: 30 minutes
Ingredients:
1 tablespoon oil (vegetable, olive, or whatever you have)
1 small onion, diced
3 cloves garlic, minced
1 teaspoon ground cumin
1 teaspoon smoked paprika (or regular paprika)
1/2 teaspoon chili powder (optional for heat)
1 can (15 oz) black beans, drained and rinsed
1 cup uncooked rice (white or brown)
2 1/4 cups water or vegetable broth
1/2 teaspoon salt (adjust to taste)
Juice of 1 lime (optional, but brightens the dish)
Chopped cilantro, green onion, or shredded cheese (optional toppings)
Instructions:
Sauté aromatics: In a large skillet or saucepan, heat oil over medium heat. Add diced onion and sauté for 3–4 minutes until softened. Add garlic, cumin, paprika, and chili powder. Cook for 30 seconds until fragrant.
Add rice and beans: Stir in the rice and cook for 1–2 minutes to lightly toast. Add the black beans, water (or broth), and salt.
Simmer: Bring to a boil, then reduce heat to low. Cover and simmer until rice is cooked and liquid is absorbed—about 18 minutes for white rice or 35–40 minutes for brown.
Fluff and finish: Remove from heat and let sit covered for 5 minutes. Fluff with a fork and squeeze in fresh lime juice if using.
Serve it up: Top with chopped herbs, a sprinkle of cheese, a dollop of sour cream or yogurt, or hot sauce if you have it.
Why It Works:
Affordable & filling: Beans and rice are classic budget staples that are nutritious and satisfying. One pan = easy cleanup.
Customizable: Add canned corn, sautéed bell peppers, or a fried egg on top if you’ve got extras on hand.
Meal-prep friendly: Tastes even better the next day and freezes well.
This dish is comfort food without the cost—packed with smoky flavor, protein, and fiber.

Here’s a budget-friendly bread pudding that’s easy to make, freezer-friendly, and delivers serious “wow” factor with rich flavor and texture.
🍞 Budget-Friendly Caramel Vanilla Bread Pudding
Serves: 6–8
Estimated Cost: Under $7 total
Freezer-Friendly: Yes (freezes well for up to 2 months)
Ingredients:
6 cups day-old bread, cubed (French, sandwich, brioche, or hot dog buns—use what you have!)
2 cups milk (any kind: dairy or unsweetened plant milk)
3 eggs
1/2 cup sugar (brown sugar or white)
1 tablespoon vanilla extract
1 teaspoon cinnamon
1/4 teaspoon salt
2 tablespoons melted butter or margarine
Optional: 1/2 cup raisins, chopped apples, or chocolate chips
For Simple Caramel Drizzle:
1/2 cup brown sugar
1/4 cup butter
2 tablespoons milk Pinch of salt
Instructions:
Preheat oven to 350°F (175°C). Grease an 8×8 baking dish or similar-sized pan.
Prep the bread: Tear or cut the bread into bite-sized pieces. Place them in the baking dish.
Make the custard: In a bowl, whisk together milk, eggs, sugar, vanilla, cinnamon, salt, and melted butter. Pour evenly over the bread. Press the bread down gently so it soaks up the liquid. Let it rest (optional but best): Let the mixture sit for 15–30 minutes to fully absorb. You can also refrigerate it overnight.
Bake: Bake uncovered for 35–40 minutes, or until golden brown and the center is set but still slightly soft.
Make caramel drizzle (optional, but worth it): In a small saucepan over medium heat, melt the butter. Add brown sugar, milk, and a pinch of salt. Stir constantly until it thickens slightly (about 2–3 minutes). Remove from heat.
Serve: Drizzle the warm caramel sauce over the bread pudding just before serving. Add a sprinkle of cinnamon or a scoop of ice cream if you’re feeling fancy.
Why It Wows Without the Price Tag:
Uses up stale bread: No waste = real savings.
Simple ingredients: Milk, eggs, and sugar are inexpensive and go far.
Customizable: Add-ins like raisins, fruit, or chocolate give variety without extra cost. Freezes beautifully: Just cool, wrap tightly, and freeze. Reheat in the oven or microwave.
Freezing Tip:
Let the pudding cool completely. Wrap in foil, then place in a freezer bag. To reheat, thaw overnight in the fridge, then warm in a 325°F oven for 15–20 minutes.

Here’s a budget-friendly muffin recipe that’s easy, delicious, and made with simple pantry staples. These muffins are moist, fluffy, and packed with flavor — perfect for breakfast, snacks, or freezing for later.
Cinnamon Banana Oat Muffins
Makes: 12 muffins
Estimated Cost: Under $5 total (less than 50¢ per muffin)
Freezer-friendly & kid-approved!
Ingredients:
2 ripe bananas, mashed
1/2 cup sugar (white or brown)
1/3 cup oil (vegetable, canola, or melted butter)
1/2 cup milk (dairy or non-dairy)
1 teaspoon vanilla extract
1 egg
1 cup all-purpose flour
1 cup rolled oats
1 teaspoon baking powder
1/2 teaspoon baking soda
1 teaspoon ground cinnamon
1/4 teaspoon salt
Optional (but great if you have it):
1/4 cup chopped nuts or raisins
Extra cinnamon sugar for sprinkling on top
Instructions:
Preheat oven to 350°F (175°C). Line a muffin tin with paper liners or lightly grease.
Mix the wet ingredients: In a large bowl, mash the bananas. Add sugar, oil, milk, vanilla, and egg. Whisk until well combined.
Add dry ingredients: Sprinkle flour, oats, baking powder, baking soda, cinnamon, and salt over the wet mixture. Stir just until combined — don’t overmix. Fold in any optional add-ins.
Fill the muffin tin: Divide batter evenly among the 12 cups. Sprinkle tops with a pinch of cinnamon sugar if desired.
Bake: Bake for 18–22 minutes, or until a toothpick inserted into the center comes out clean.
Cool: Let muffins cool in the pan for 5 minutes, then transfer to a wire rack to cool completely.
Budget Tips:
Bananas: Use overripe bananas that might otherwise be thrown out.
Oats: Stretch your flour with oats for extra nutrition and texture.
Oil vs. butter: Oil is cheaper and gives these muffins a moist, tender crumb.
Milk substitutions: Water, powdered milk, or plant milk all work here.
Bonus: Freezer Friendly!
Wrap cooled muffins in foil or plastic wrap, store in a freezer bag, and freeze for up to 3 months. Reheat in the microwave for 30–45 seconds or pop in the toaster oven.
