

In the hustle and bustle of modern life, procrastination has evolved into an art form. Among its many iterations, procrastibaking stands out as a uniquely sweet and aromatic way to delay tasks. The term combines “procrastination” and “baking,” describing the act of baking as a means to avoid completing more pressing responsibilities. But unlike typical procrastination, procrastibaking often results in something tangible—and delicious.
The Allure of Procrastibaking
For many, procrastibaking provides a therapeutic escape from the stress of looming deadlines. Baking offers a sensory experience: the feel of kneading dough, the aroma of cinnamon wafting through the air, the sight of a perfectly risen cake. These small joys offer immediate satisfaction, a stark contrast to the delayed gratification of completing work or chores.
Psychologists suggest that procrastibaking taps into our desire for control and creativity. When overwhelmed by seemingly insurmountable tasks, the simplicity and predictability of baking can be grounding. Following a recipe step by step provides structure, while experimenting with flavors and decorations fosters creativity.
A Historical Context
Procrastibaking may feel like a modern phenomenon, but its roots can be traced back to historical periods of stress and uncertainty. During the Great Depression, home bakers turned to creative cooking as a way to distract themselves and make the most of limited resources. Similarly, during the COVID-19 pandemic, baking surged in popularity as people found solace in sourdough starters and banana bread.
Social media has also amplified procrastibaking, turning it into a global pastime. Platforms like Instagram and TikTok feature countless photos and videos of elaborate cakes, cookies, and pastries. Sharing these creations online provides not only a sense of accomplishment but also social validation, making the act of baking feel purposeful even when other tasks are neglected.
The Science Behind Procrastibaking
From a psychological perspective, procrastibaking falls under the umbrella of productive procrastination. While it delays one task, it achieves another, giving the illusion of productivity. Neuroscientists believe this behavior is linked to the brain’s reward system. Baking releases dopamine, the “feel-good” chemical, which can temporarily ease anxiety and boost mood.
Additionally, the tactile and repetitive motions involved in baking can induce a meditative state. This calming effect helps reduce stress, making it easier to return to the original task with a clearer mind.
How to Embrace Procrastibaking Responsibly
Although procrastibaking can be enjoyable and even therapeutic, it’s essential to strike a balance. Here are some tips to make the most of your procrastibaking sessions:
1. Set Limits: Allocate a specific amount of time for baking, ensuring it doesn’t derail your entire day.
2. Choose Simple Recipes: Opt for quick, straightforward recipes to minimize cleanup and maximize enjoyment.
3. Incorporate Baking into Your Routine: Use baking as a reward after completing a challenging task rather than as an avoidance strategy.
4. Share Your Creations: Sharing your baked goods with friends, family, or coworkers turns your procrastibaking into an act of kindness.
5. Reflect on Your Goals: After baking, revisit your to-do list with a refreshed perspective and tackle the most pressing tasks.
Procrastibaking Recipes to Try
For those ready to dive into the world of procrastibaking, here are a few beginner-friendly ideas:
• Banana Bread: The ultimate comfort bake, perfect for using up overripe bananas.
• Chocolate Chip Cookies: A timeless classic that’s quick and satisfying.
• Mini Pies: Experiment with fillings for a personalized touch.
• Cupcakes: Simple to make and fun to decorate.
• Scones: A versatile option that pairs beautifully with tea or coffee.
Procrastibaking is more than just a way to delay responsibilities—it’s a creative outlet, a form of self-care, and a source of joy. While it’s no substitute for tackling life’s challenges head-on, it can provide a much-needed break, allowing you to return to your tasks with renewed energy. So the next time you find yourself avoiding work, why not preheat the oven and whip up something delightful? You might just find that a little sweetness can make even the most daunting tasks seem manageable.

Classic Banana Bread Recipe
Prep Time: 10 minutes
Cook Time: 55-65 minutes
Total Time: 1 hour 15 minutes
Yield: 1 loaf (8-10 slices)
Ingredients:
• 3 medium ripe bananas (mashed, about 1 ¼ cups)
• ⅓ cup unsalted butter (melted and slightly cooled)
• ½ cup granulated sugar
• ¼ cup brown sugar (packed)
• 2 large eggs (room temperature)
• 1 teaspoon pure vanilla extract
• 1 ½ cups all-purpose flour
• 1 teaspoon baking soda
• ½ teaspoon salt
• 1 teaspoon ground cinnamon (optional, for added flavor)
• ½ cup chopped walnuts or chocolate chips (optional, for mix-ins)
Instructions:
1. Preheat Oven:
Preheat your oven to 350°F (175°C). Grease a 9×5-inch loaf pan or line it with parchment paper for easy removal.
2. Mash Bananas:
In a large mixing bowl, mash the ripe bananas until smooth using a fork or potato masher.
3. Mix Wet Ingredients:
Add the melted butter, granulated sugar, brown sugar, eggs, and vanilla extract to the mashed bananas. Whisk until well combined.
4. Combine Dry Ingredients:
In a separate bowl, whisk together the flour, baking soda, salt, and cinnamon (if using).
5. Incorporate Dry into Wet:
Gradually add the dry ingredients to the wet ingredients, mixing gently until just combined. Avoid overmixing, as this can make the bread dense.
6. Add Mix-ins (Optional):
Fold in chopped walnuts, chocolate chips, or your preferred mix-ins with a spatula.
7. Pour Batter into Pan:
Transfer the batter to the prepared loaf pan, smoothing the top with a spatula.
8. Bake:
Place the pan in the preheated oven and bake for 55-65 minutes, or until a toothpick inserted into the center comes out clean.
9. Cool:
Remove the banana bread from the oven and let it cool in the pan for 10 minutes. Then transfer it to a wire rack to cool completely before slicing.
Tips for Success:
• Use ripe, spotty bananas for the best flavor and natural sweetness.
• To make the recipe dairy-free, substitute butter with coconut oil or a neutral vegetable oil.
• For a more indulgent version, drizzle with a simple glaze made of powdered sugar and milk.
Enjoy your homemade banana bread warm, slathered with butter, or as-is with a cup of coffee or tea!
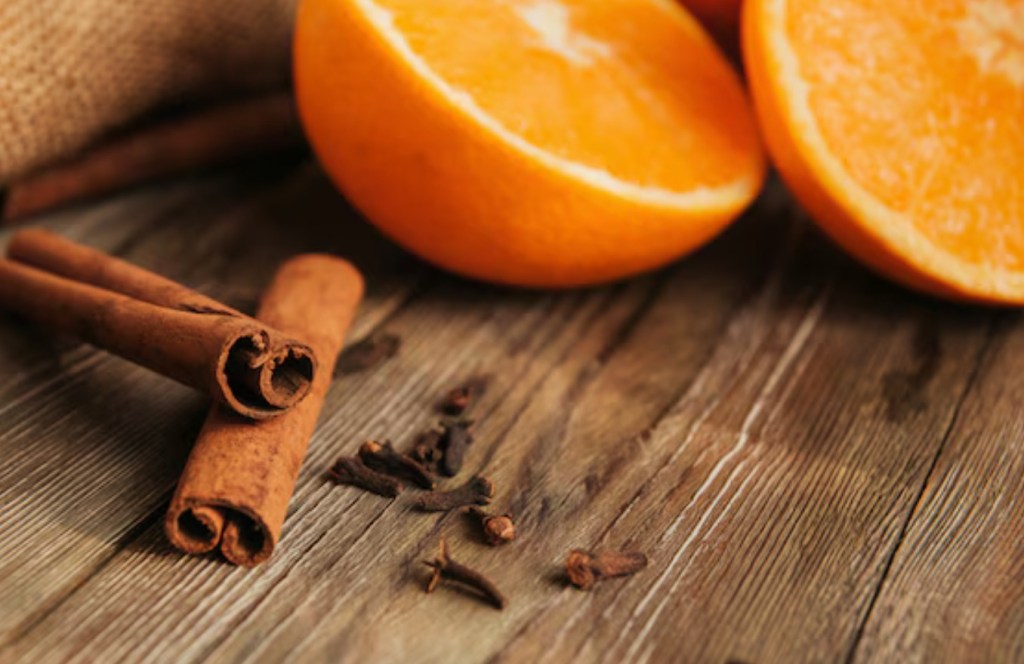
January-Inspired Spiced Orange Cupcakes
Prep Time: 15 minutes
Cook Time: 20-22 minutes
Total Time: 45 minutes
Yield: 12 cupcakes
Ingredients
For the Cupcakes:
• 1 ½ cups all-purpose flour
• 1 teaspoon baking powder
• ½ teaspoon baking soda
• ½ teaspoon salt
• 1 teaspoon ground cinnamon
• ½ teaspoon ground ginger
• ¼ teaspoon ground nutmeg
• ½ cup unsalted butter, softened
• ¾ cup granulated sugar
• 2 large eggs (room temperature)
• 1 teaspoon pure vanilla extract
• ½ cup fresh orange juice (from about 1 large orange)
• Zest of 1 orange
• ½ cup plain yogurt or sour cream
For the Frosting:
• 1 cup unsalted butter, softened
• 4 cups powdered sugar, sifted
• 2-3 tablespoons fresh orange juice
• 1 teaspoon pure vanilla extract
• Zest of ½ an orange (optional)
For Garnish:
• Candied orange slices or twists of orange peel
• A sprinkle of cinnamon sugar (optional)
Instructions
1. Preheat Oven:
Preheat your oven to 350°F (175°C) and line a 12-cup muffin tin with cupcake liners.
2. Mix Dry Ingredients:
In a medium bowl, whisk together the flour, baking powder, baking soda, salt, cinnamon, ginger, and nutmeg. Set aside.
3. Cream Butter and Sugar:
In a large mixing bowl, beat the butter and sugar together with a hand or stand mixer until light and fluffy (about 2-3 minutes).
4. Add Eggs and Flavoring:
Beat in the eggs one at a time, followed by the vanilla extract, orange juice, and orange zest. The mixture may look slightly curdled—this is normal.
5. Combine Wet and Dry Ingredients:
Gradually add the dry ingredients to the wet ingredients in three additions, alternating with the yogurt or sour cream. Begin and end with the dry ingredients, mixing just until combined.
6. Fill and Bake:
Divide the batter evenly among the prepared cupcake liners, filling each about 2/3 full. Bake for 20-22 minutes, or until a toothpick inserted into the center comes out clean.
7. Cool:
Remove the cupcakes from the oven and let them cool in the pan for 5 minutes, then transfer to a wire rack to cool completely before frosting.
8. Make the Frosting:
In a large bowl, beat the butter until creamy. Gradually add the powdered sugar, 1 cup at a time, mixing on low speed to avoid a sugar cloud. Add the orange juice, vanilla extract, and orange zest (if using), and beat until smooth and fluffy. Adjust the consistency with a little more orange juice (for thinner frosting) or powdered sugar (for thicker frosting).
9. Frost and Garnish:
Using a piping bag or spatula, frost the cooled cupcakes generously. Top with candied orange slices, twists of orange peel, or a sprinkle of cinnamon sugar for a cozy, wintery touch.
Serving Suggestions
These spiced orange cupcakes pair beautifully with a warm cup of tea or a spiced latte. Their bright citrus notes and warm spices make them a perfect pick-me-up for chilly January days.
Enjoy your winter-inspired treat!

The Ultimate Scone Recipe
Prep Time: 15 minutes
Cook Time: 12-15 minutes
Total Time: 30 minutes
Yield: 8 large scones
Ingredients
For the Scones:
• 2 cups (250g) all-purpose flour
• 2 teaspoons baking powder
• ½ teaspoon baking soda
• ½ teaspoon salt
• 3 tablespoons granulated sugar
• ½ cup (115g) unsalted butter, cold and diced
• ⅔ cup (160ml) cold heavy cream (plus extra for brushing)
• 1 large egg
• 1 teaspoon pure vanilla extract
• Optional mix-ins: ½ cup dried fruits, chocolate chips, or fresh berries
For the Glaze (Optional):
• 1 cup (120g) powdered sugar
• 2-3 tablespoons milk or cream
• ½ teaspoon pure vanilla extract
Instructions
1. Preheat the Oven:
Preheat your oven to 400°F (200°C). Line a baking sheet with parchment paper or a silicone baking mat.
2. Combine Dry Ingredients:
In a large mixing bowl, whisk together the flour, baking powder, baking soda, salt, and sugar.
3. Cut in the Butter:
Using a pastry cutter, fork, or your fingertips, cut the cold butter into the flour mixture until it resembles coarse crumbs with pea-sized pieces. Work quickly to keep the butter cold.
4. Mix Wet Ingredients:
In a small bowl, whisk together the heavy cream, egg, and vanilla extract.
5. Combine Wet and Dry Ingredients:
Pour the wet mixture into the dry ingredients and stir gently with a spatula until just combined. If using mix-ins like dried fruit or chocolate chips, fold them in at this stage. The dough will be slightly sticky.
6. Shape the Dough:
Turn the dough onto a lightly floured surface and gently knead it 3-4 times to bring it together. Pat it into a 1-inch-thick round (about 8 inches in diameter).
7. Cut the Scones:
Using a sharp knife or a bench scraper, cut the round into 8 equal wedges. Place the wedges onto the prepared baking sheet, leaving space between them for spreading.
8. Brush and Bake:
Brush the tops of the scones with a little heavy cream for a golden finish. Bake in the preheated oven for 12-15 minutes, or until the scones are lightly golden on top and a toothpick inserted into the center comes out clean.
9. Cool and Glaze (Optional):
Allow the scones to cool slightly on a wire rack. If glazing, whisk together the powdered sugar, milk or cream, and vanilla extract until smooth. Drizzle the glaze over the scones.
Tips for Perfect Scones
• Keep it cold: Use cold butter and cream to achieve a tender, flaky texture. You can even chill the dough for 10 minutes before baking.
• Don’t overmix: Overworking the dough can make the scones dense. Mix just until the ingredients come together.
• Customize: Add lemon zest, orange zest, or spices like cinnamon for a unique twist.
Serving Suggestions
Serve these ultimate scones warm with clotted cream, butter, and jam for a classic experience. Pair with a cup of tea or coffee for the perfect treat!
